Automated Garage Door Remote
Overview
My wife and I just moved into a new apartment and we now have a surprising new responsibility: a garage, with a door that should be kept closed. I imagine that this isn’t a problem for most people, but I’ve struggled to close the door a few times as I drive away… and now I have a new-found anxiety that I’ve left the door open a lot of the time.
I thought that maybe I could use one of my ESP32s as a sensor to report the closed/open state of the door so I can check in the middle of the night without getting up. I figured that while I was at it, I may as well automate it such that the door can close itself if left open for too long (Update: after a few months of the door closing itself chaotically on Madeleine, I’ve decided this was a bad move – it now just sends a push notification to let me know if the door has been open too long!).
The original script I wrote to control the door was in pure C++, and was pretty janky. It had an internally-defined timer set to 10 minutes, such that if the door was open for >10 minutes it would close itself. It accepted an input_number from a slider input in Home Assistant which allowed me to manually change the auto-close time, but it would revert to 10 minutes every time the door closed. After a while this got pretty annoying!
I was recently able to sit down and set the whole thing up in ESPhome – something I didn’t even know about when I wrote the first iteration. It’s insane how much easier it was!
Materials & Components
- ESP32-C3 super mini
- A cheap garage door remote (make sure it matches signal type of the opener!)
- A Hall effect sensor
- A spare USB data cable
- A little plastic box to house the device and mount it to the wall
Assembly
As usual, I forgot to take very many pictures while this was a work in progress…
I started this project by trying to find a way to activate the remote with the ESP32. At first I tried using some input pins on the remote PCB (see the picture below), but I couldn’t get the signal to work properly with these – I think because the voltage going into the “CLK” pinout wasn’t correct.
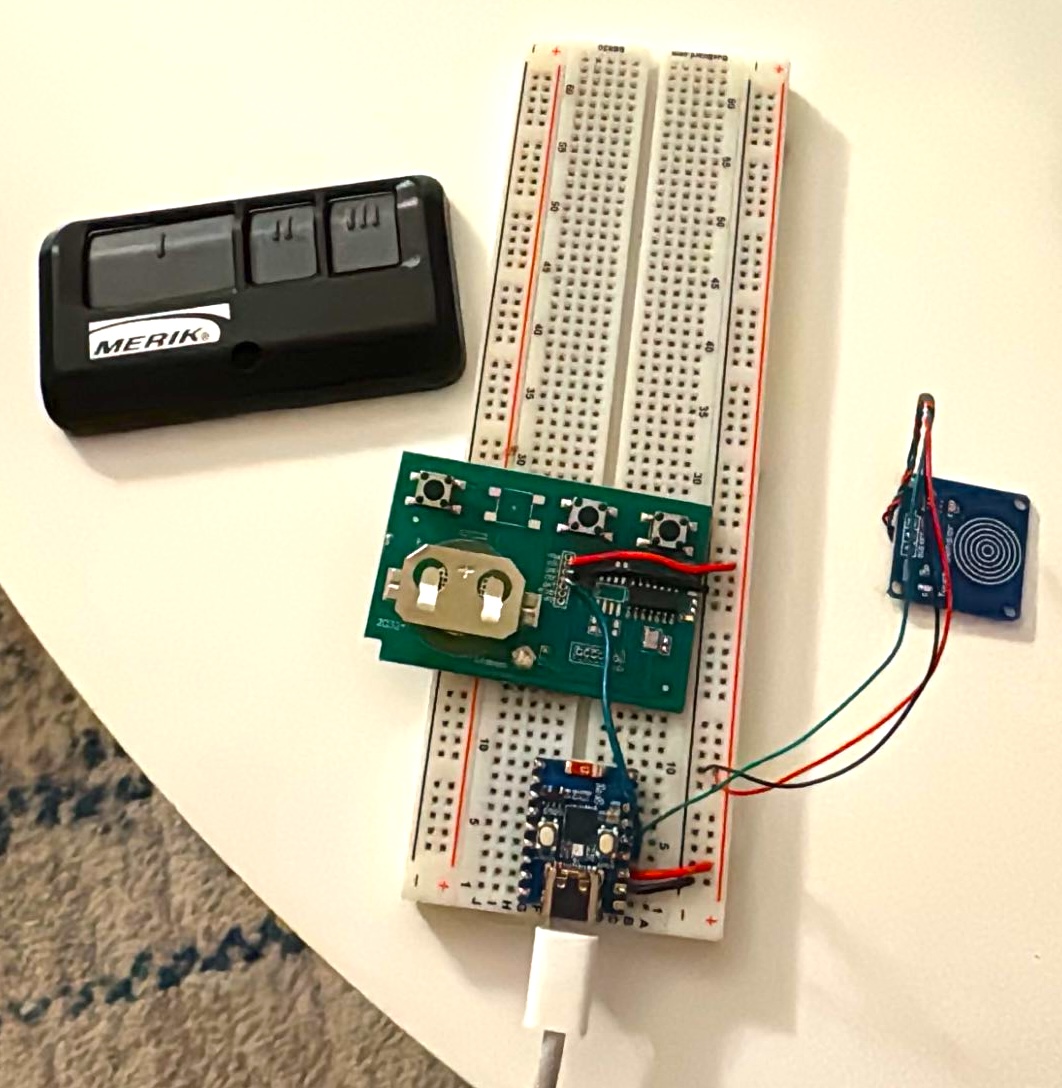
After some testing with a breadboard, I found that the most reliable way to do this was to add a transistor that could close the activation button using a 3.3 V GPIO output signal. Interestingly, I also noticed that this transistor needed an additional load LED going to the ESP32 ground in order to work – which I think suggests that the button typically uses a pull-down resistor?
My next step was to start testing the WiFi and MQTT connections so that I could get the ESP32 to publish the door state to my HomeAssistant setup – and to subscribe to a command topic which would allow me to open and close the door on command. I did a lot of testing with the battery removed from the door remote so I didn’t open and close the door 10,000x – instead, I added an extra external button so I could manually trigger the ESP32 to detect an open/close signal. I used the ESP32’s on-board RGB LED as a reporter signal of the WiFi/MQTT connection and the trigger signal (note the bright red signal when I push the button in the video below).
An external button triggers the ESP32 to update an “open”/“closed” boolean which HomeAssistant reads as “Unlocked”/“Locked”. This also works in reverse: triggering a state change in HomeAssistant updates the state onboard the ESP32. However, without an external sensor, the ESP32 has no way to record the real state of the door.
Adding a Hall effect sensor allows me to detect the true state of the door. I wanted this sensor to be on a long cord so I’d have options on where to mount it – cue me destroying a spare USB-C cable and attaching 3-pin connectors to each end.

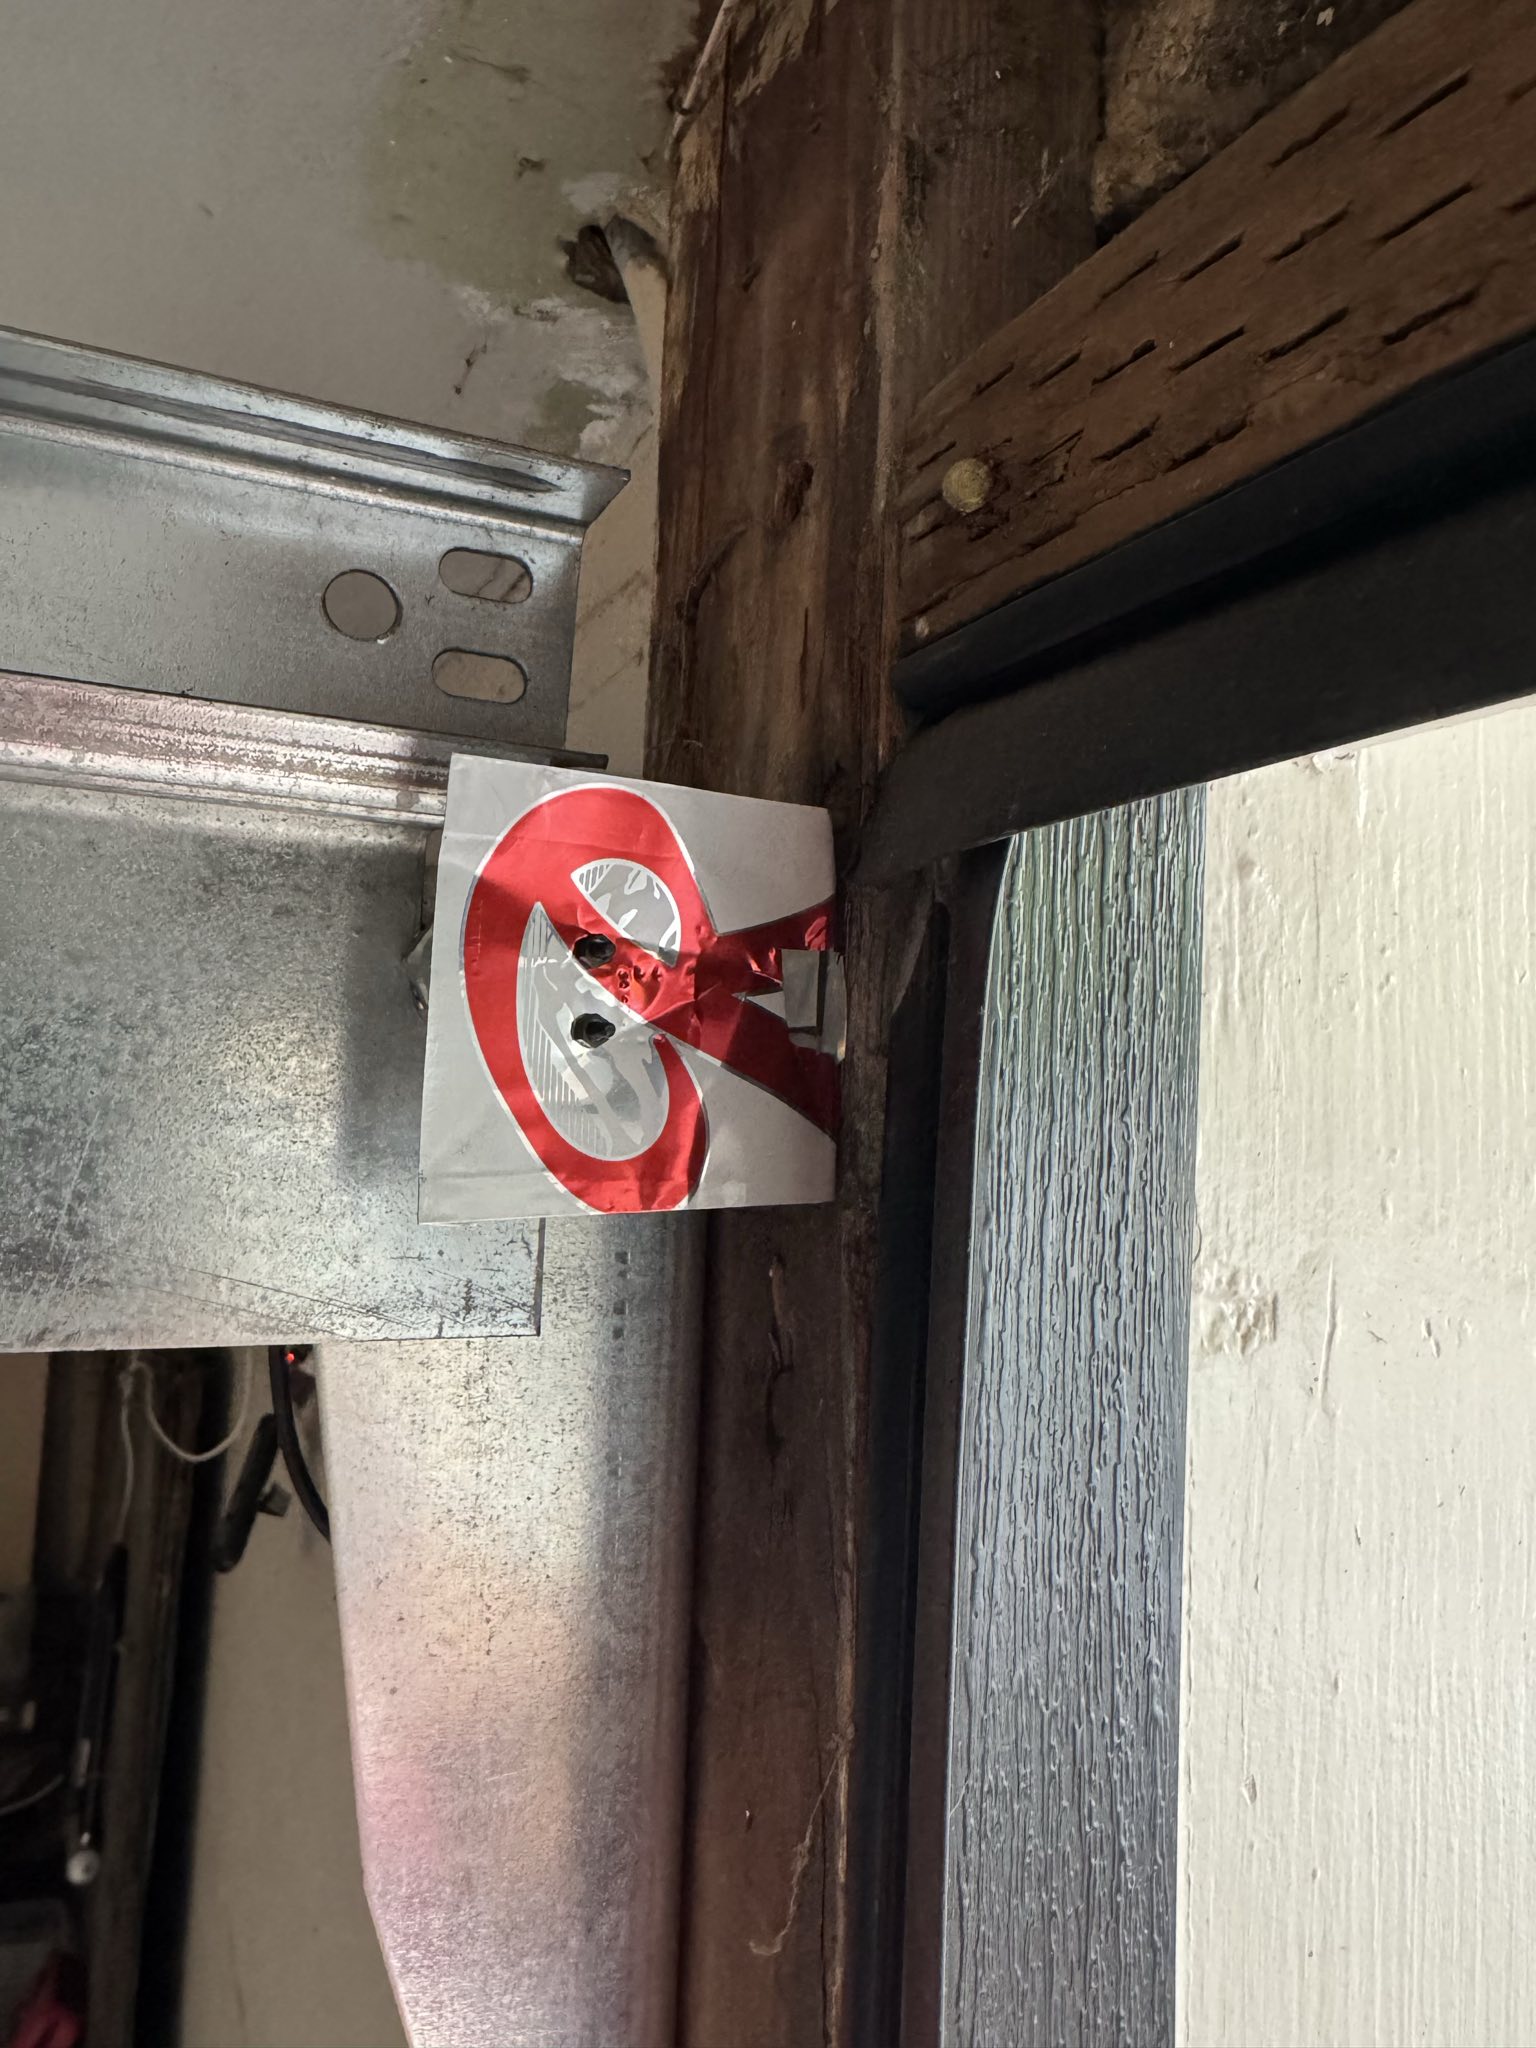
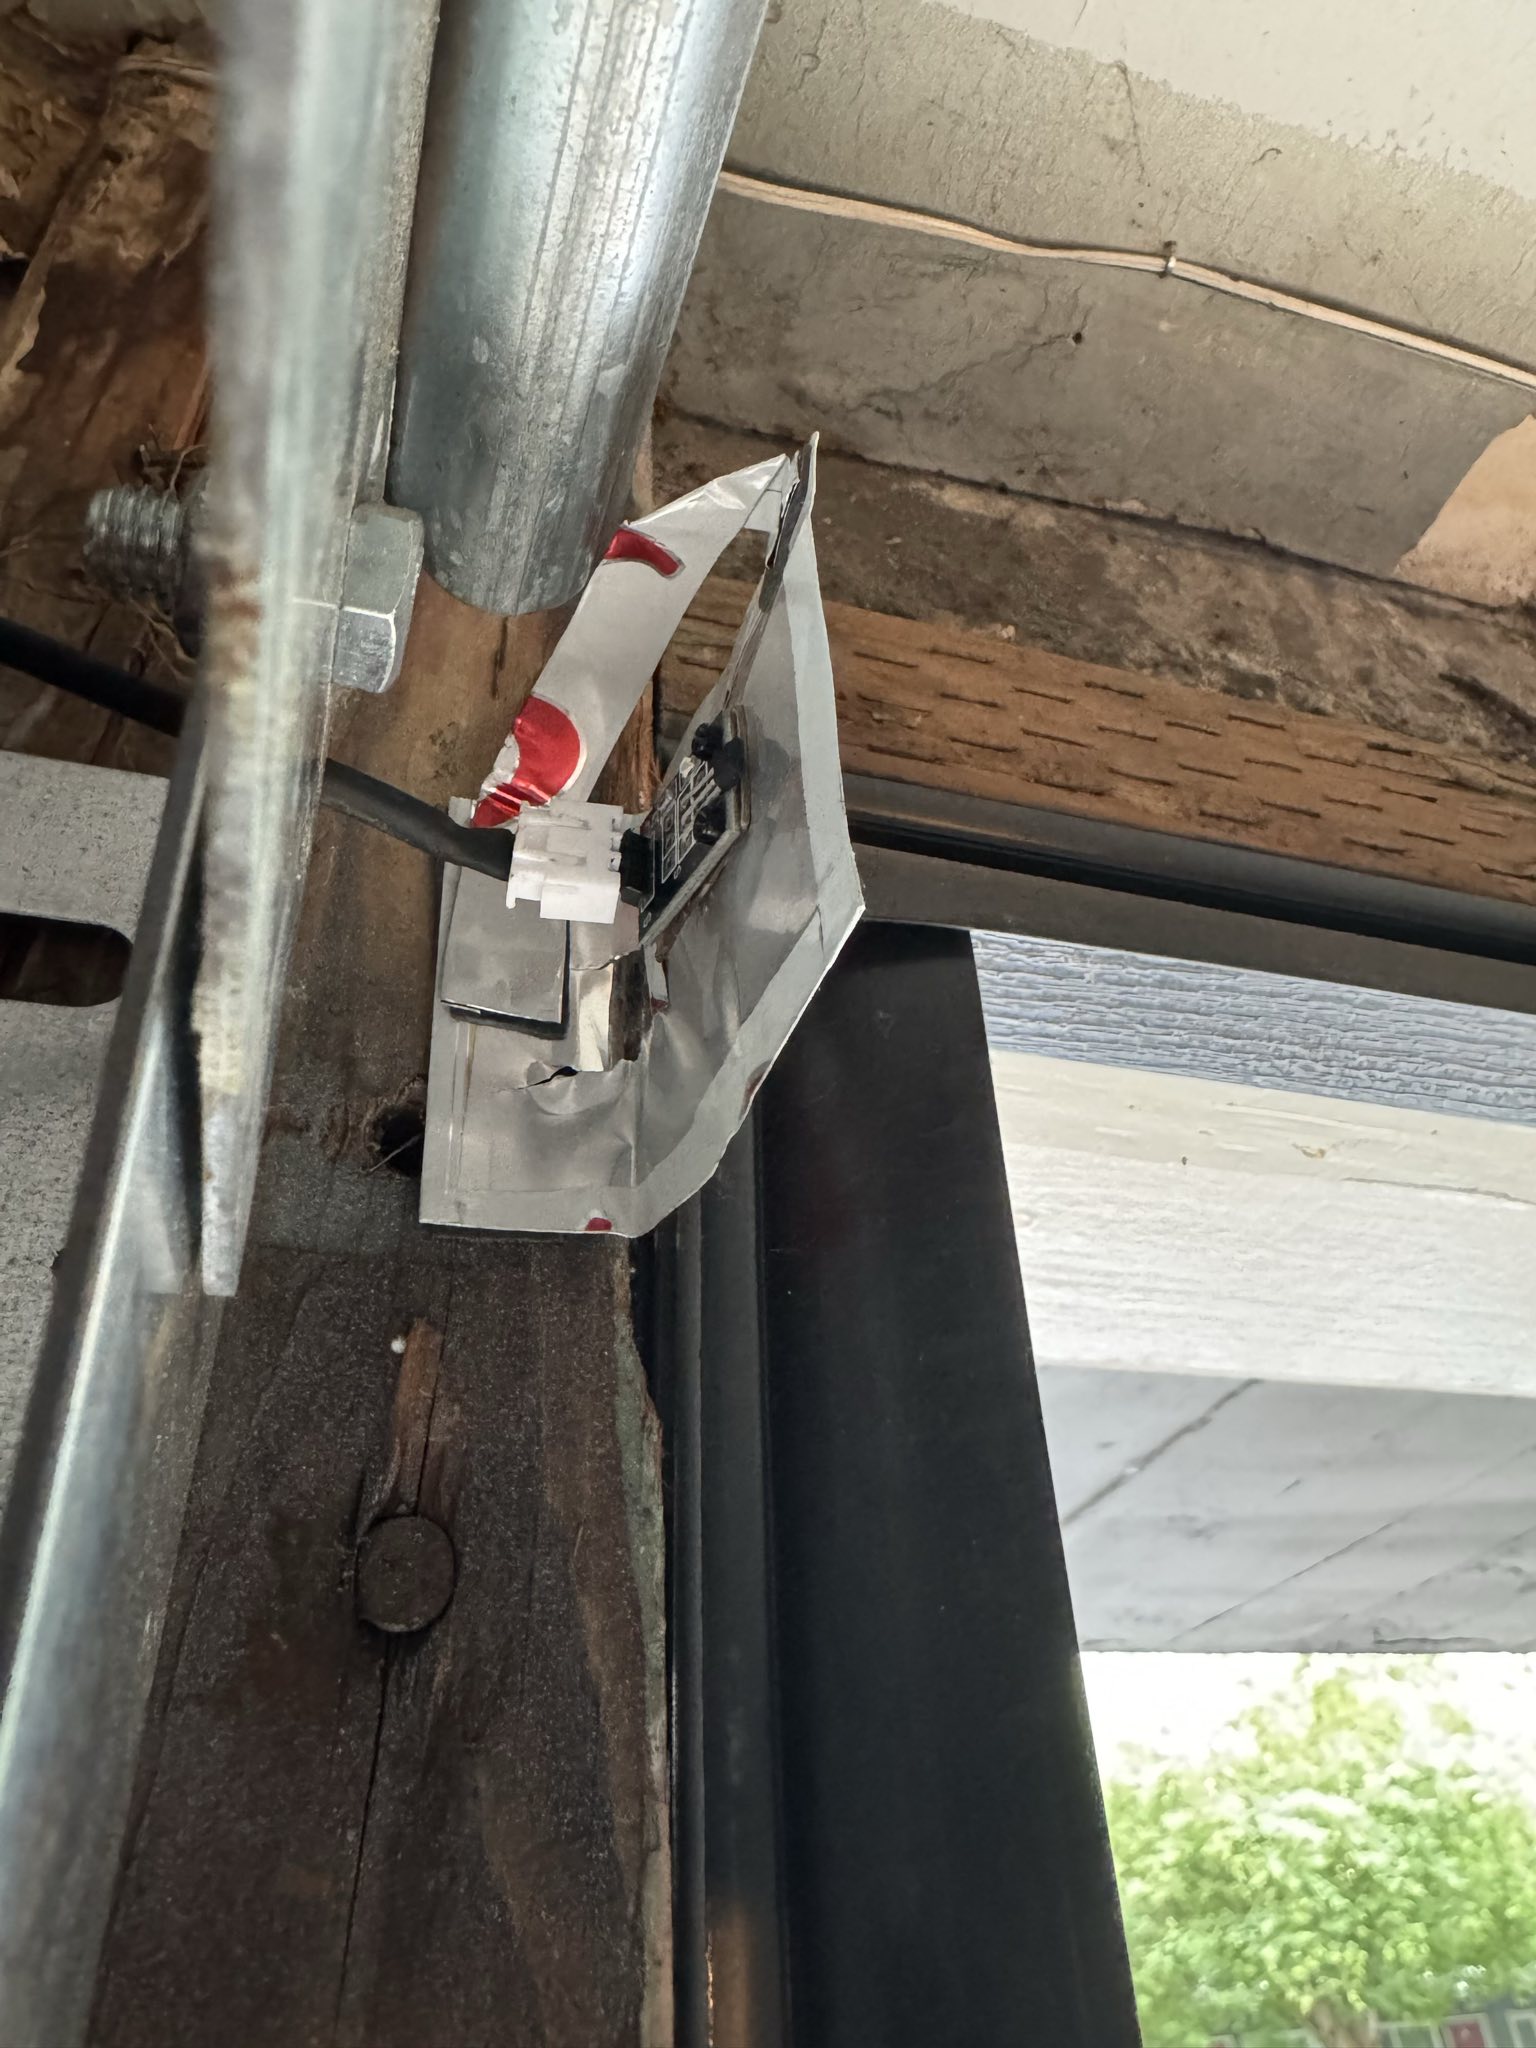
I next needed to craft a stable mount for this sensor sit close enough to a magnet on the garage door. I thought very carefully about my options and decided that an aluminum can would be the perfect source material for this mount. I got out my tin snips, a metal ruler, and some super adhesive mounting tape to build a little mount. I then drilled some holes in order to screw the Hall effect sensor to the mount and fixed the whole thing to the wall close enough to my magnet to be triggered when the door is closed.
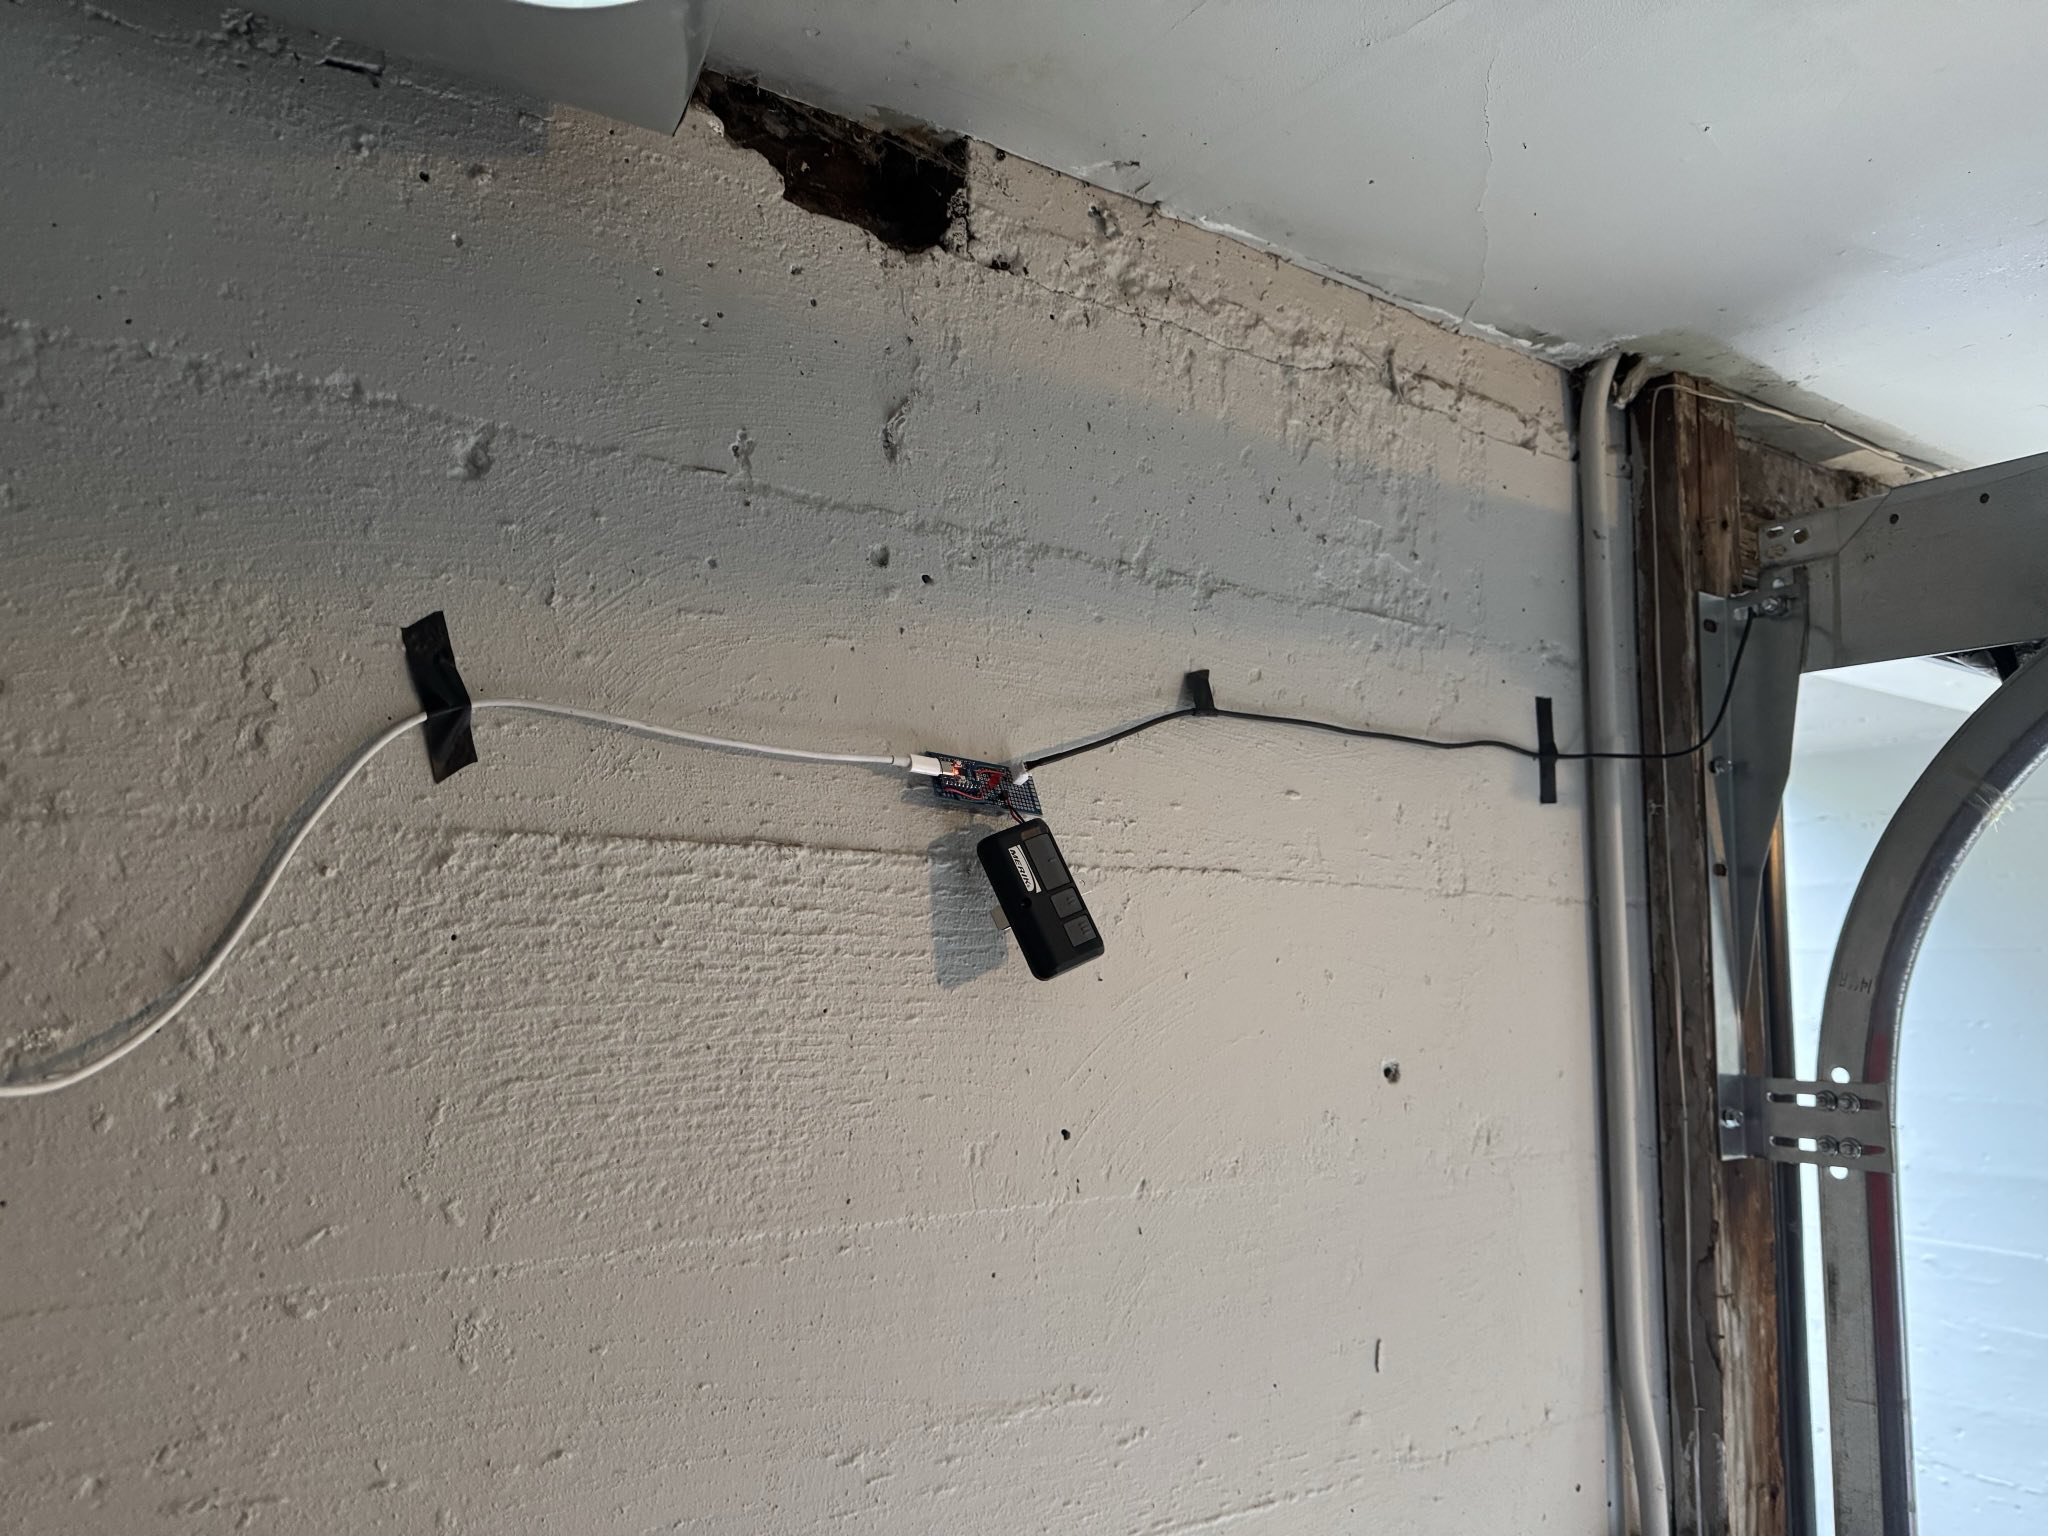
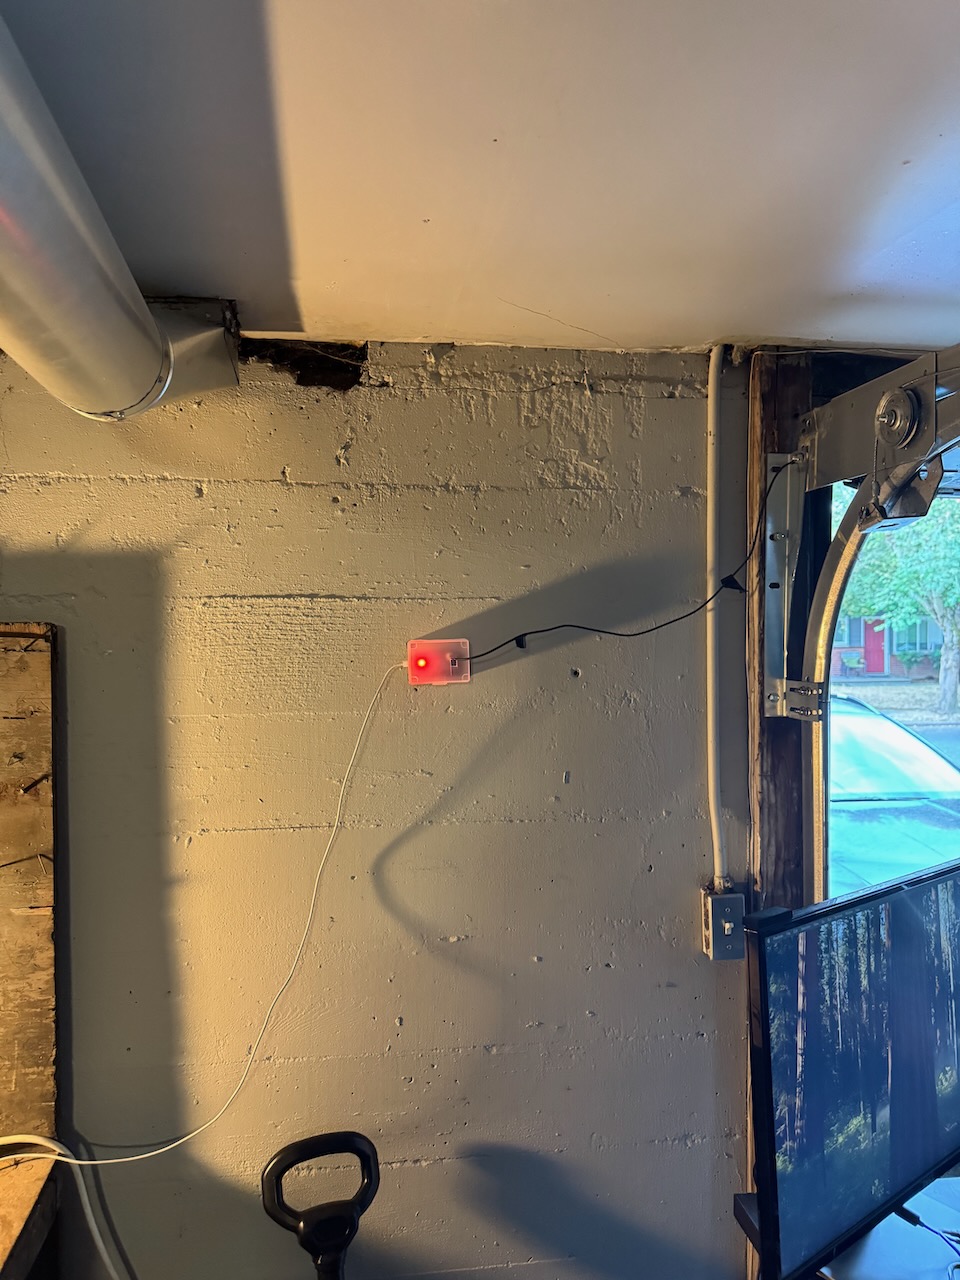
For a good few months I left this little board dangling from the connection cable leading to the Hall effect sensor – a truly janky look. I finally took the time to squeeze it into a little plastic box that kind of obscures the jank and now it looks slightly less like a IED hooked up to the door.
Code
Update, as I wrote above, this code section is now out of date! This project is my first which has a real connection with the real world. I need to be confident that this little device won’t end up spazzing out and opening the garage door while we’re away.
My ideas for this include: using a GeoFence to disable it when I’m away for some amount of time (i.e. reporting my location to HomeAssistant, and putting it into a hard off state) and not actually giving it any of its own automation ability (I had originally wanted it to automatically trigger the door to close after some amount of time, instead I might have it send a push notification to me via HomeAssistant).
I had a fun round of debugging when the sensor got dislodged and the remote got activated every 2 seconds for the 10+ minutes it took for my wife to come down and unplug it following the first time I left the house after installing the device… The solutions were to find a better spot to mount the sensor and to add a 15 second delay after the trigger function to give the door sufficient time to actually close.
New ESPhome yaml: My original iteration was truly too bad to include here. But I’m happy enough with my final product that I can show it off here!
esphome:
  name: garagedoorcontroller
  friendly_name: GarageDoorController

esp32:
  board: esp32-c3-devkitm-1
  framework:
    type: arduino

# Enable logging
logger:

# Enable Home Assistant API
api:
  encryption:
    key: !secret garagedoor_api

ota:
  - platform: esphome
    password: !secret garagedoor_ota

wifi:
  ssid: !secret wifi_ssid
  password: !secret wifi_password

  manual_ip:
    static_ip: !secret garagedoor_ip
    gateway: !secret gateway
    subnet: !secret subnet

  # Enable fallback hotspot (captive portal) in case wifi connection fails
  ap:
    ssid: !secret garagedoor_ap_ssid
    password: !secret garagedoor_ap_password

captive_portal:

# Hall effect sensor, reports whether magnet on door is engaged
binary_sensor:
  - platform: gpio
    pin:
      number: GPIO5
      # inverted: True
    name: "Garage Door Sensor"
    id: garage_door_sensor
    device_class: garage_door
    on_state:
      then:
        - if:
            condition:
              binary_sensor.is_on: garage_door_sensor
            then:
              - light.turn_on:
                  id: status_light
                  red: 10%
                  green: 0%
                  blue: 0%
            else:
              - light.turn_off: status_light

# Status light, only illuminated if the door is open
light:
  - platform: neopixelbus
    type: RGB
    pin: GPIO10
    variant: ws2812x
    num_leds: 1
    id: status_light
    name: "Garage Status Light"
    internal: True

# The relay pin that triggers the door clicker
output:
  - platform: gpio
    pin: GPIO0
    id: garage_relay

# As recommended by my friend Britt, a cover is definitely the way to go for this door
  # In HA, this allows for an "open", "close", and "stop" command -- allowing the door to be part-way open
  # After triggering a change, the Hall effect sensor is queried and returns its state to HA to report the state of the door
cover:
  - platform: template
    name: "Garage Door"
    id: garage_door
    open_action:
      - output.turn_on: garage_relay
      - light.turn_on:
          id: status_light
          red: 0%
          green: 0%
          blue: 100%
      - delay: 500ms
      - light.turn_off:
          id: status_light
      - output.turn_off: garage_relay
    close_action:
      - output.turn_on: garage_relay
      - light.turn_on:
          id: status_light
          red: 0%
          green: 0%
          blue: 100%
      - delay: 500ms
      - light.turn_off:
          id: status_light
      - output.turn_off: garage_relay
    stop_action:
      - output.turn_on: garage_relay
      - light.turn_on:
          id: status_light
          red: 0%
          green: 0%
          blue: 100%
      - delay: 500ms
      - light.turn_off:
          id: status_light
      - output.turn_off: garage_relay
    optimistic: False
    assumed_state: False
    lambda: |-
      if (id(garage_door_sensor).state) {
        return COVER_OPEN;
      } else {
        return COVER_CLOSED;
      }
I do feel like the arcane magic of yaml is still very mysterious to me – like it seems like there’s no obvious resources where you can see all the possible options for every type of entity… I have to admit that I had to ask ChatGPT to help me build the right settings for things like the cover, where I just couldn’t find clear instructions online.
Home Assistant integration
After deciding that the device shouldn’t have the authority to close the door on its own, I set up an automation in Home Assistant that logs how long the door has been in the “open” state and sends a push notification to my phone. And from the HA app, I can trigger the door to close! No more input_number that you have to adjust every time you want the door open!